Showing posts with label tutorial. Show all posts

Friday, April 8, 2016

Fancy Fridays Week One

Fancy Fridays Week One: Smokey Eye

I had the idea to start an ongoing weekly series of posts where I do an eye tutorial for a more fancy or formal look, so I'm going to try it out and see how it goes! Smokey eyes seem really fancy to me, and they're not all too difficult to accomplish once you get the hang of it, so I decided I would start with that. Since prom season is fast approaching, I'll probably do a couple of prom looks as well. For today's look, I chose to use the Urban Decay Naked Smoky palette.

I put down the shade Combust as my transition so that all of the other colors would blend better. This is probably my all-time favorite transition shade for my skintone.


Next I used the shade Password in my crease to add some depth.


After that I added the shade Whiskey to my crease, this time a bit more concentrated to add even more depth.


To start off the lid shades, I put the shade Thirteen on the inner third of my lid. It's okay if it gets on the middle third of the lid because we'll be covering that up with a darker shade in just a moment.


For the middle third of the lid I used the shade Dagger. Make sure to blend it into Thirteen well.


I used the shade Black Market on the outer third of the lid, making sure to blend it really well and build it up slowly as it's easy to go overboard with black.


I added the shade High to my inner corner and browbone as a highlight because I wanted some sparkle, but this is totally optional and you could also go with a matte shade.


As a finishing touch, I put the shade Smolder on my lower lashline and blended it out a bit for a smokier look.


Many people say not to pair a smokey eye with a bold lip because they distract from each other, but I just absolutely love the look of a smokey eye with a red lip, so I did it anyways. When it comes to makeup, there really are no rules, so do whatever you want! I used MAC Russian Red.

Thursday, March 3, 2016

Eye Look

Eye Look Using MAC Amber Lights

I just got the MAC eyeshadow Amber Lights and I wanted to play around with it. I ended up liking how it turned out, so I'm posting it here. I think I'll experiment with using it wet next, since it's not quite as vibrant as I'd like on it's own. I also used the Urban Decay Naked Smoky palette to create this look.

I started with the shade Combust as my transition shade. This shadow is one of my favorite transition shades.


I used a couple very light layers of Whiskey in my crease. I didn't want it to be very dark so I kept it really light.


Next, I put the star of the show, Amber Lights by MAC, all over my lid and blended it a bit up into the crease.


After that I used the shade Dirtysweet on my lower lashline. I wet my brush before using it so that it would be more intense.


I used the shade Thirteen wet as my browbone highlight. I used it wet since I find that on it's own this shade never really shows up on me.


I put the shade High on my inner corner, and the shadow is done!


Eyeliner is optional, but I do highly recommend mascara. I think mascara is an essential for any eye look because I feel it really pulls everything together.


Here is the look paired with MAC's Craving, which is an Amplified finish. I like how the darker lips look with the eyes.

Tuesday, March 1, 2016

Two-Palette Look

Maggie Plays With Eyeshadows

I've been loving the Hard Candy Look Pro Neutral Eyes palette, as well as the Too Faced Chocolate Bar palette, so I was playing around with them together and I ended up liking how it turned out. I was also experimenting with using shadows wet, since I like my shimmery shades to be really shimmery. I use my iPhone 6 camera to take the pictures that go on my blog, and it doesn't pick up on shimmer very well, so I'm really sorry about that.

First I took the shade Chatty from the Hard Candy palette and ran it through and above my crease as my transition color.


Second, I took the shade Salted Caramel from the Too Faced palette as my crease shade and blended it into my transition.


For a pop of major shimmer, I took the shade Girlie from the Hard Candy palette and used it wet all over the lid. I just used water to wet it, which apparently you're not supposed to do, but I did it anyways because I'm a rebel.


Next I took Girlie, still wet, and put it on my lower lashline.


After that I got my brush wet and took the shade Champagne Truffle from the Too Faced palette as an inner corner and browbone highlight.


Add winged liner and mascara and you're done!


Here's how it looks paired with a lip option. I put a Buxom Full-On Lip Polish in Margaret on top of a MAC lipstick in Brave. Brave is my go-to lip color because it goes with pretty much every eye look.

Monday, February 29, 2016

Halo Eye

Halo Eye Eyeshadow Tutorial + Lip Option

I've been really wanting to try out doing a halo eye look, and the shade Girlie in the Hard Candy Look Pro Neutral Eyes palette looked like it would be perfect for a pop of shimmer in the middle of the lid, so I created this look using that palette. I experimented a bit with using shadows wet as well, so I'll note which shadow I did that with when we get to that step.

Using a blending brush, buff the shade Chatty into and above the crease as a transition shade so that your crease shade will blend easier and look more gradient.


Put the shade Toying in the crease, working in light layers and slowly building up color.


Sorry this picture is out of focus, I didn't realize until after I had completed the next step so I couldn't retake it. I took the shade Philander and placed it on the inner and outer thirds of the lid, staying away from the middle of the lid entirely. I did take the color up into the crease a little bit.


Next, I wet my brush with the Hard Candy Fast & Fabulous Setting Spray and dipped into the shade Girlie before putting it on the middle third of my lid. I wet my brush so that the color would be more intense and metallic looking. It doesn't look nearly as good on camera as it did in person, but believe me, it makes a huge difference. Make sure to blend the edges of the lid colors together.


After that I blended my crease some more so that everything looked more put together.


I put the shade Coy on the lower lashline because I think it makes everything look a lot more complete.


Adding the shade Bashful as an inner corner and browbone highlight pulls everything together nicely!


Blend some more, add liner and mascara, and you're done!


For the lips, I applied Wet' n' Wild's Mega Last lipstick in Just Peachy under Stila's Stay All Day Vinyl lip gloss in Nude. I think this look would also look nice paired with a red lip.

Wednesday, February 24, 2016

Eye Look

Hard Candy Neutral Eyes Palette Look

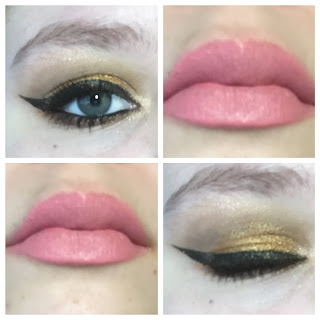
In a recent haul I showed you the Hard Candy Neutral Eyes palette I got from WalMart. I wanted to do a look using the pretty copper-gold color in it, and I decided to do the look using only colors from the same palette.

Use the shade Chatty as a transition shade, making sure to blend it out well and get it all over the crease and a bit above. This gives the crease shade something to blend into.


Use the shade Toying in the crease, blending it up into the transition shade.


Put the shade Coy all over the lid, blendig it into the crease slightly for a more blended, less harsh look when you close your eyes.


Use the shade Bashful as an inner corner and browbone highlight. This shade reminds me a bit of the shade Champagne Truffle in the Too Faced Chocolate Bar palette, which I also use as an inner corner and browbone highlight a lot.


Use the shade Frisky on the lower lashline to pull everything together. I think this look looks much better with something on the lower lashline.


Add finishing touches like mascara and eyeliner and the look is done!


I paired this eye look with the Hard Candy Velvet Mousse Matte Lip Color in Sweet Pea. I haven't tried it out much yet but so far I really like it. I haven't worn it long enough to know if it dries matte yet, but I'll update you on it in a later post.

Friday, February 5, 2016

All Matte Eye Look

All Matte Eye Look + Lip Option

I don't know if I've done an all-matte eye look on my blog yet, so I wanted to make sure I had at least one! I love a shimmery shade all over the lid, but mattes are really nice sometimes. I only used one palette for this look - the Makeup Revolution Essential Mattes palette. It has lots of really pretty mattes in it so that's what I chose to use.

I used the 5th shade from the left as a transition shade. It's dark enough that you can see it but light enough that it works as a transition shade on my skin color.


Next I used the 8th shade from the left in my crease and blended it into the transition shade. I'll keep adding small amounts of this shade as I blend other colors into it so it doesn't disappear.


Since I'm going to be using lighter colors on my lid, I wanted to put a white cream base down first. This way the light colors will show up better.


I used the 12th shade from the left (the rightmost shade) all over my lid and blended it into the crease shade as well.


Next I put the 9th shade from the left in my outer v and blended it out really well. I also blended it onto the outer half of my lid.


After that I took my brush, sprayed it with setting spray, and used it to apply the 11th shade from the left on my lower lashline. It doesn't show up as well unless you wet your brush, but if you do it looks much more intense.


The last shadow step is to use the 1st shade on the left as an inner corner and browbone highlight. I would usually use a shimmery shade for this because I prefer how it looks, but a matte shade works for a more subtle effect.


Add liner and mascara and you're done!


I paired this eye look with the Bite Beauty Luminous Creme Lipstick in Pepper. This look is more on the cool-toned side and this lipstick isn't too warm so I thought they looked good together.

Valentines Look 1

A Very Pink Valentines Day Look

I wanted to do a couple of looks for Valentines day, and I really wanted to do one using the shade Strawberry Bon Bon in the Too Faced Chocolate Bar palette because I never use it and I wanted to play around with it. I'm very happy with how this one turned out so I'm posting it. I also used the Urban Decay Electric palette.

I started by putting the shade Salted Caramel from the Chocolate Bar palette in my crease and blending it out. I went with this color because I wanted my crease/transition shade to be warm to match the bright shade I use later.


Next, I applied a white cream base to my lid so that the light lid shade will pop and be more visible.


After that I used the shade Strawberry Bon Bon from the Chocolate Bar palette and put it all over my lid, making sure to blend it into the crease. This shade doesn't show up on my unless I use a white cream base, but it would probably show up fine on darker skin colors without a base.


Then I slowly layered the shade Savage from the Electric palette into my outer v, making sure to blend it really well so it looked soft and had no harsh lines.


To finish off the shadow, I took Savage and put it on my lower lashline and I used Champagne Truffle from the Chocolate Bar palette as a browbone and inner corner highlight.


I added liner and mascara, which are optional, but I think it makes the eyes look bigger and brighter. I would pair this look with a pinky-nude lip color and I think that it would look really nice.